How to Update PHP in WordPress: Step-by-Step Guide
 Fact-checked
Last Updated: February 1, 2023
What Is PHP Used for in WordPress?
Step 1: Create a Backup of Your WordPress Site
Step 2: Checking Your Current PHP Version
Step 3: Update WordPress Core
Step 4: Update Themes and Plugins
Step 5: Run a Compatibility Check (Optional)
Step 6: Update PHP Version
Step 7: Fix Possible Issues
Key Takeaways
Benefits of Having the Newest PHP Version
Conclusion
Although many WordPress users aren’t aware, knowing how to update PHP in WordPress is one of the most important parts of maintaining your WordPress website. It’s absolutely crucial for the security, functionality, and performance of your website. That being said, it might seem overly technical and daunting, especially if you’re new to WordPress.
In this guide, we’ll help you conquer your fears by showing you exactly how to update your WordPress website’s PHP version.
We’ll cover:
- What is PHP used for in WordPress?
- How to update PHP
- FAQs
What Is PHP Used for in WordPress?
Standing for Hypertext Preprocessor, PHP is an open-source scripting language widely used in web development. It’s a server-side scripting language, which means the code is executed by the server and not the website visitor’s computer. Because it’s open-source, current versions of PHP are continuously being improved and updated by the community.
Being a standardized programming language, it should be no surprise the bulk of WordPress’ core code is built on PHP. While some might find this a bit technical, WordPress’ code generally executes on the server-side, which is why you need a control panel like cPanel or a local server to host a WordPress website. This is where PHP comes in.
In WordPress, PHP typically plays the role of putting together the website pages from information stored in the WordPress database. So, if you’ve ever wondered “is WordPress in PHP?” the answer is—yes, WordPress basically consists of PHP code.
The database fields contain values that correspond to the content, design, layout, and features of a WordPress page. When a visitor tries to load a page from your WordPress site, the PHP will be executed first to construct the page from the database settings before sending it to the user.
PHP is part of the reason why WordPress is free and so extensible—as a commonly used programming language, PHP lets developers create custom plugins or themes for WordPress or even make custom changes to the underlying WordPress code. So, themes, plugins, and other WordPress content typically consist mostly of a bunch of PHP files.
The latest versions of PHP are being released constantly—PHP has gone through 7 versions, and WordPress usually updates alongside each new version of PHP.
Although one of the benefits of WordPress is that users don’t need technical training or professional web development/design experience to use it, it does require some knowledge of PHP if you want to make advanced customizations or changes to your WordPress website.
Even if that’s not the case, most WordPress users should at least know the steps to update their PHP version.
| DID YOU KNOW: The newest versions of PHP, 7.4 and 8.0, can provide significant performance improvements over previous versions, so if you’re using PHP version 7.3 or lower, you’ll want to upgrade ASAP for faster loading times. |
How to Update PHP in WordPress
What you might not know is that there’s a right way and a wrong way to update your PHP version. The wrong way is simply to jump straight into updating your PHP without any preparation or backing up your existing configuration.
Why? Because if anything goes wrong during the update or your latest PHP package is corrupt, it could cause serious problems for your website. If you don’t have website backups, you could lose a lot of progress or even your entire website.
Generally, there’s a very small chance of a PHP update breaking your website, as new versions are stable and compatible. However, it’s better to be safe than sorry, so even though and the newest version of PHP is usually more stable and secure than older ones, the best practice is to have a backup of your website.
| NOTE: The steps might be somewhat different based on which hosting provider you use. We created this guide using a WordPress website hosted by Bluehost, as it’s one of the best and most popular WordPress hosts. Nevertheless, most cPanel-based hosting providers should work almost exactly the same. |
Step 1: Create a Backup of Your WordPress Site
Before we learn how to update your PHP version, we’ll first ensure you don’t lose any data or progress by creating a backup.
Once again, the steps might look slightly different depending on your hosting provider, but should mostly work the same:
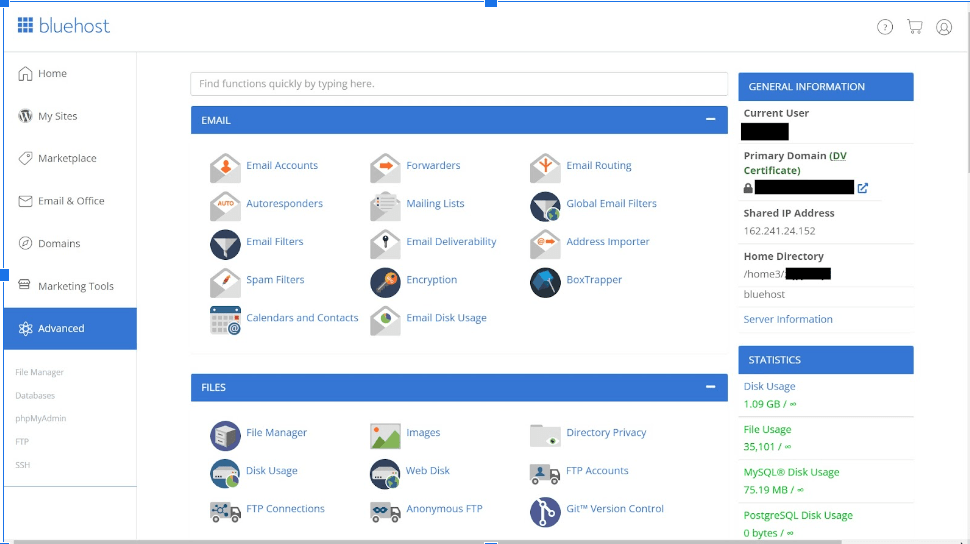
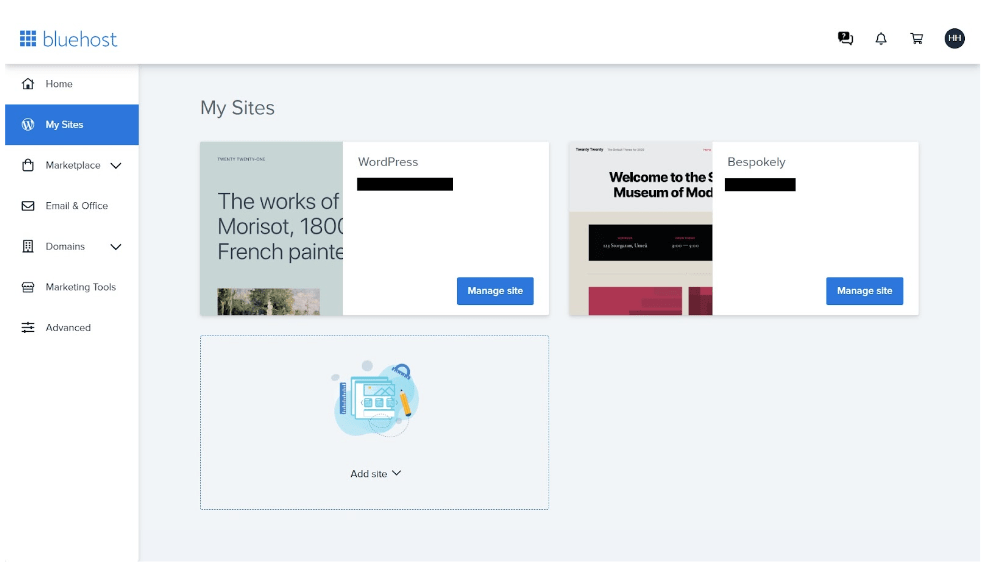
1. Log into your hosting provider’s account dashboard:
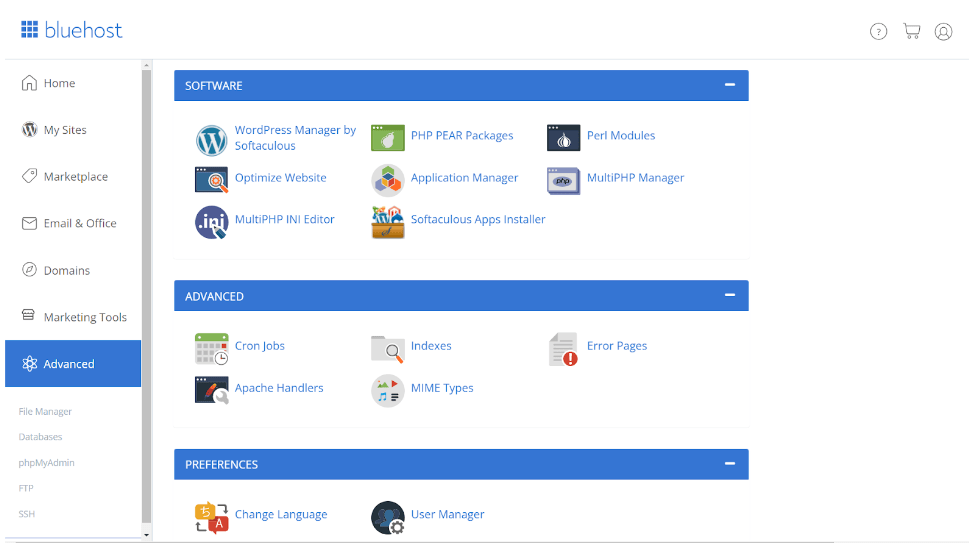
2. In the lefthand menu, go to Advanced settings. This should take you to the cPanel dashboard, which should look more or less the same for everyone:
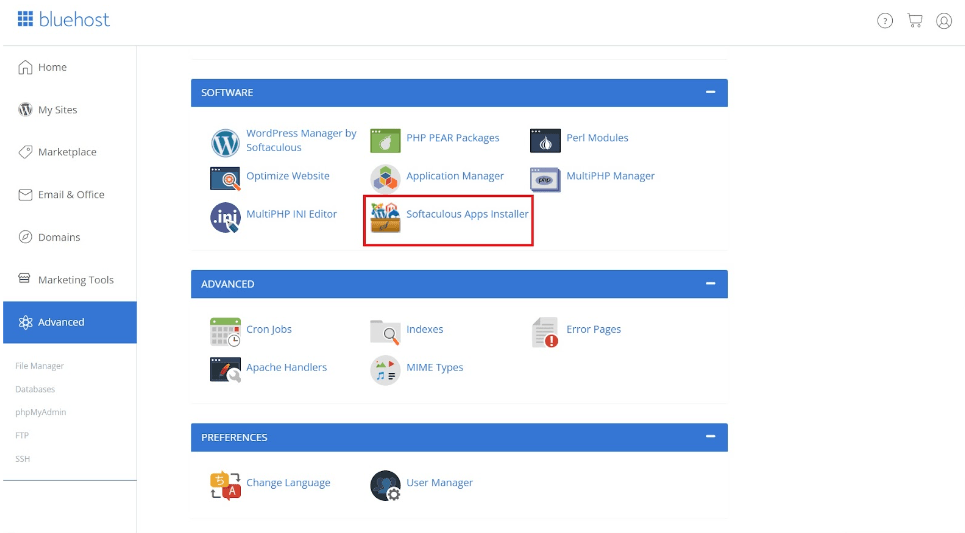
3. Open the Softaculous WordPress Manager tool, which should be under “Software” in the cPanel dashboard:
4. When Softaculous opens, click on the “WordPress Manager” icon in the top toolbar. This should show all the WordPress sites you’ve installed:
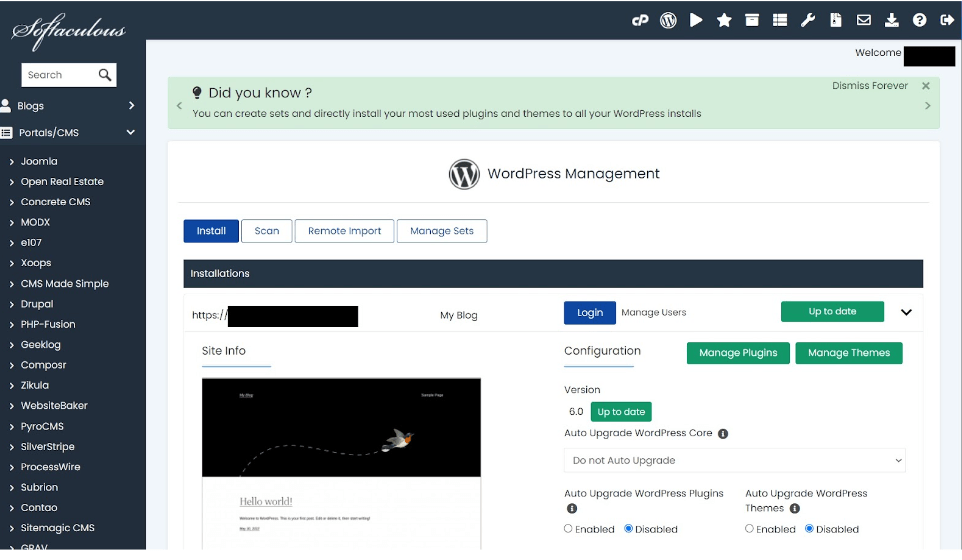
5. If you scroll down, you’ll see the “Backup” button for each site:

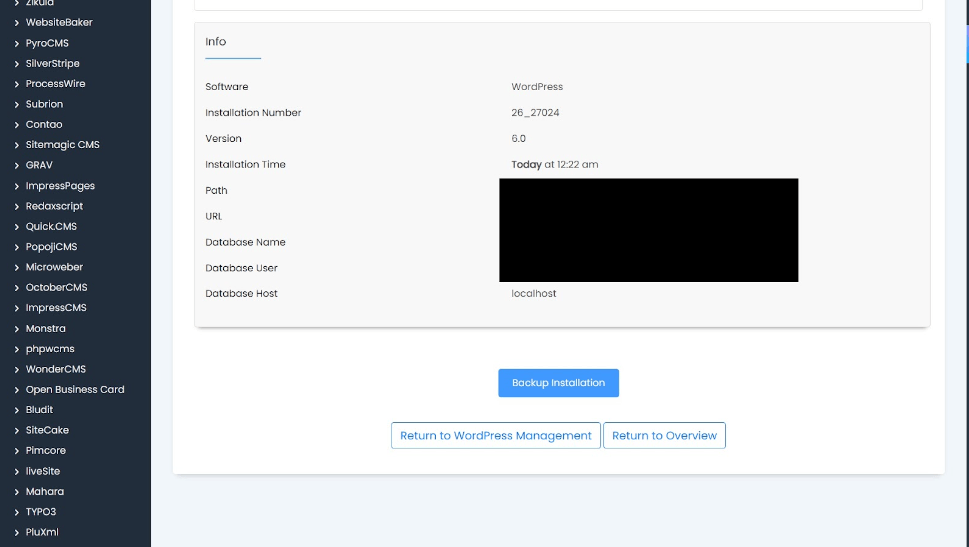
6. On the next page, you’ll be able to confirm all the details for the backup. Make sure these are correct so you can safely proceed with updating your PHP version—unless you need to change them, you can leave the default settings as is. Then, click the “Backup Installation” button to create the backup:
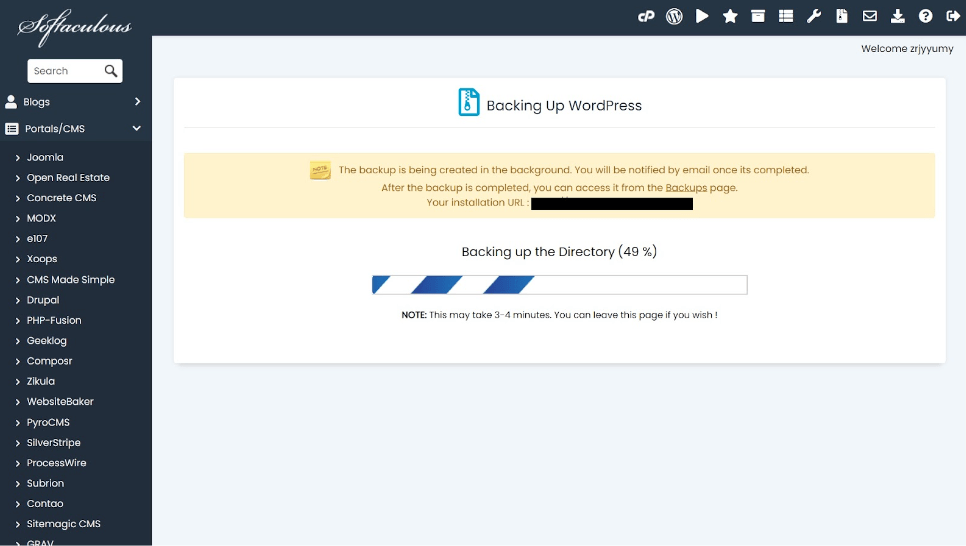
7. Softaculous will keep you updated on the progress of the backup and notify you by email when it’s ready:
And that’s it! You should now have backed up your WordPress website and can safely proceed with updating PHP.
Step 2: Checking Your Current PHP Version
Before you learn how to update it in WordPress, it’s useful to know how to check your PHP version. Here are the steps to do so:
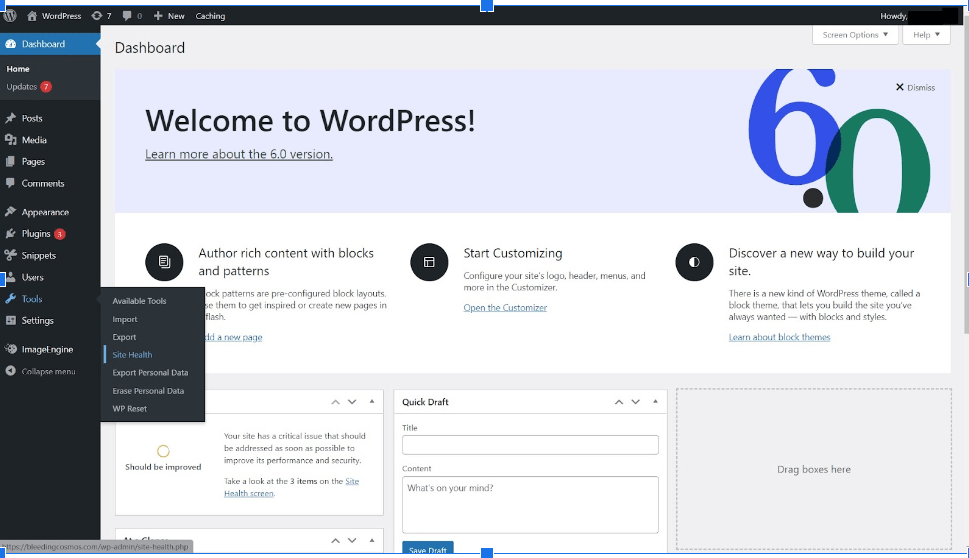
1. Log into your WordPress admin dashboard.
2. In the main navigation menu on the left, hover over “Tools” and click on “Site Health” in the dropdown menu. This is where you can check the PHP version in WordPress as well as other important site details:
3. That will take you to the Site Health page. Click on the “Info” tab next to the “Status” tab:
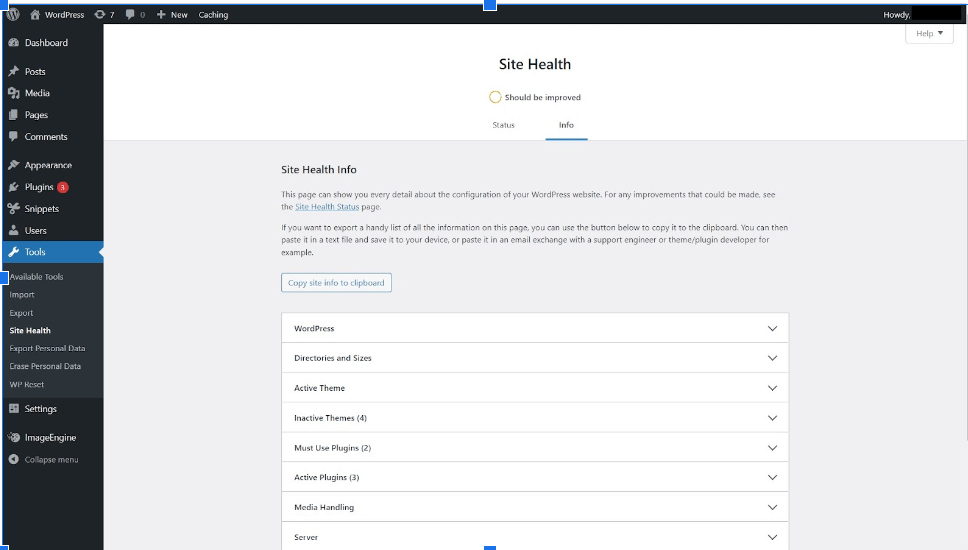
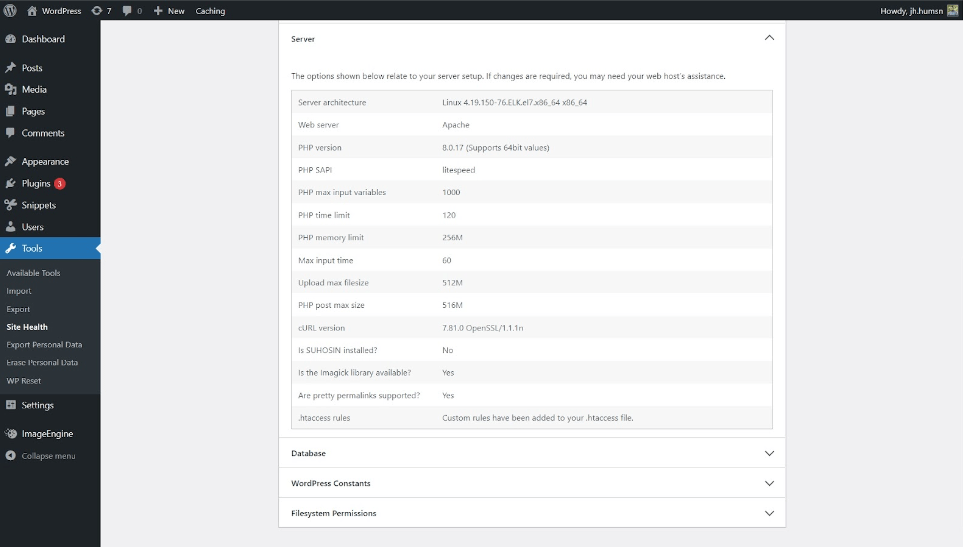
4. Scroll down to the “Server” option and click on it to expand the panel with information about your WordPress server. You’ll see “PHP version” is one of the items listed under the Server dropdown. Next to it, you should see the current PHP version number—in this case, our WordPress PHP version is 8.0.17:
So, that’s how you check your PHP version in WordPress. If you don’t have the most up-to-date version for whatever reason, you can proceed with the following steps to update your PHP.
Step 3: Update WordPress Core
Now that you know how to check the PHP version in WordPress, it’s time to actually go ahead and update your WordPress core files.
As mentioned, your WordPress website mostly runs on PHP, so it’s important you update your WordPress core installation to the latest version before updating the PHP on your server to avoid compatibility issues.
Luckily, this is very easy to do:
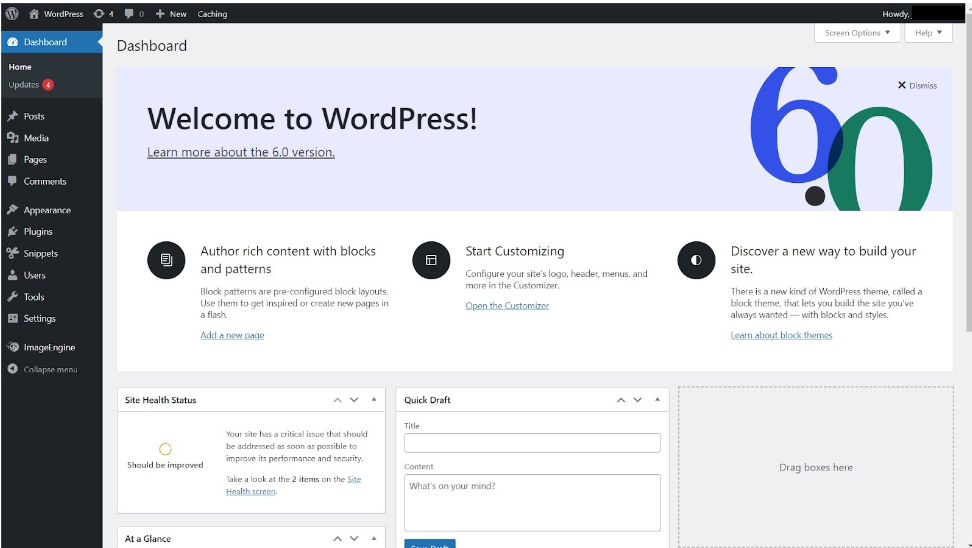
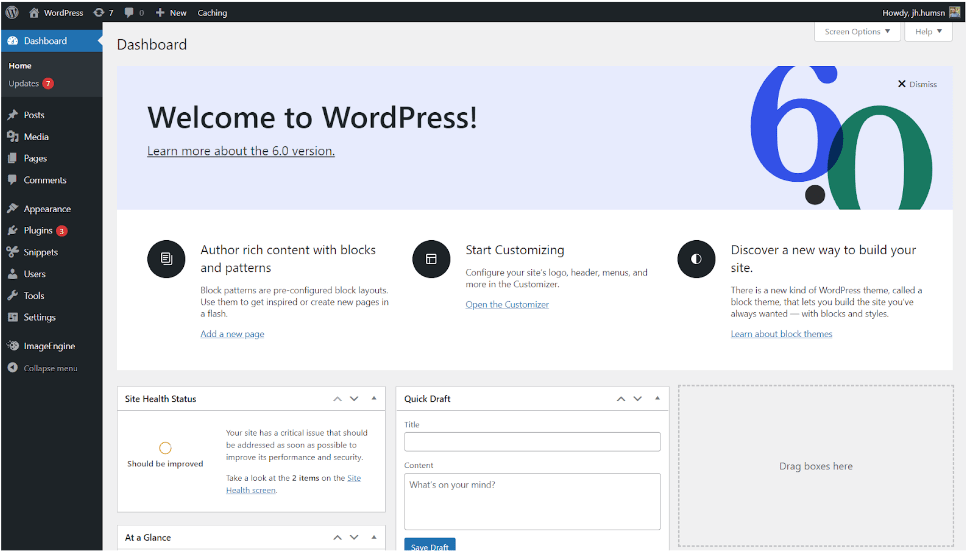
1. Log into your WordPress dashboard and click on “Updates” in the lefthand menu. A red dot with a number will indicate the available updates for your WordPress core files, plugins, or themes:
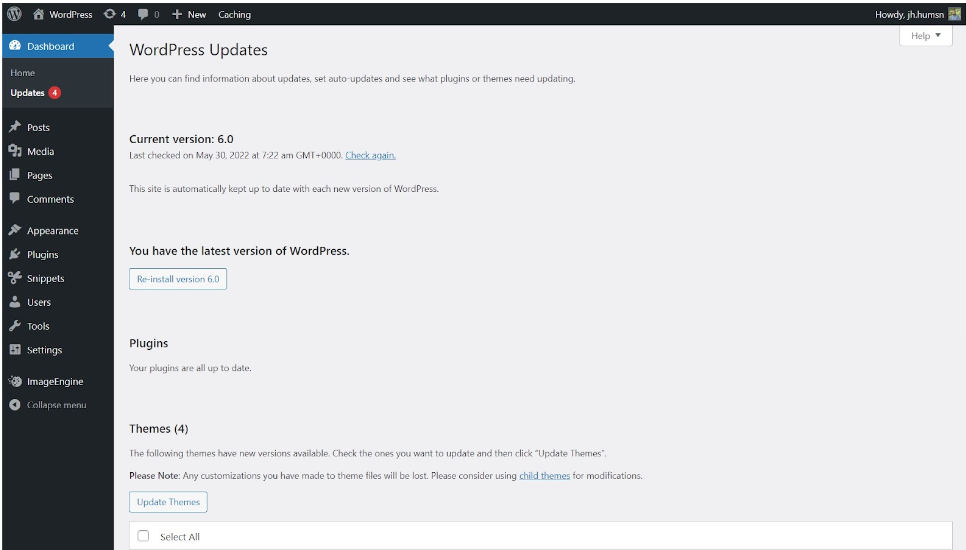
2. Below, we’re on the latest version of WordPress, so we only have the option to re-install version 6.0. You can also see your current version to determine what’s the best PHP version for WordPress. However, if there’s a newer WordPress version available, the re-install button will be replaced with one to update your WordPress version. All you need to do is click the button, and WordPress will do the rest:
| DID YOU KNOW: All WordPress installations are set by default to automatically stay up to date with the latest version. If you want to change this, you can add the snippet “define( ‘WP_AUTO_UPDATE_CORE’, false )” to your wp-config.php file. |
Step 4: Update Themes and Plugins
One of the key advantages of using WordPress is the ability to design and build your website using themes and plugins. However, these tools can break if they don’t adhere to the same PHP version as your WordPress installation, so it’s important you update these first before proceeding to update PHP on your WordPress server.
Although some WordPress installations will automatically detect outdated plugins and update them, you should always check for yourself if you’re doing a major PHP update. Here’s how you can do it:
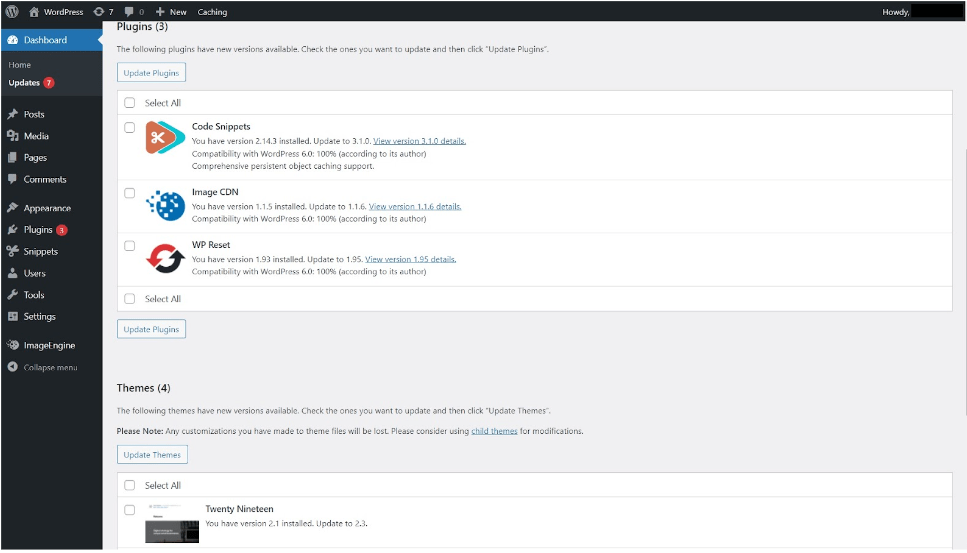
1. Log back into your WordPress dashboard. WordPress should show if some themes or plugins are outdated by showing a red circle with a counter next to “Updates,” “Appearance,” or “Plugins” in the lefthand menu:
2. Although you can click on any of the options, we’ll use “Updates” for the purposes of this tutorial. Once you click on it, you’ll see the Update page that contains lists of all outdated plugins and themes, which we recommend you update before you update PHP on your WordPress server. To do so, click “Select All” or check the specific plugins/themes you want to update. Once you’ve selected them all, click “Update Plugins” or “Update Themes”:
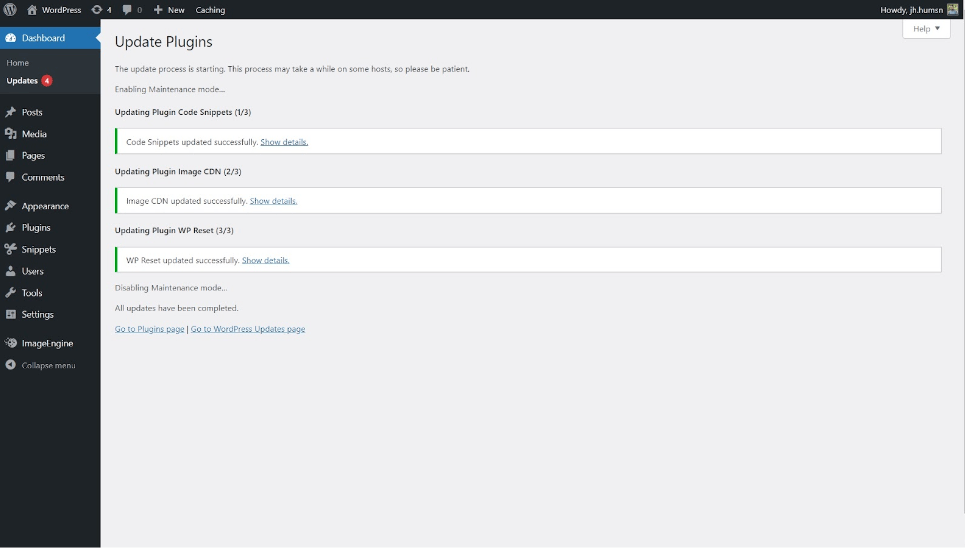
3. If the updates were successful, you’ll see the following page. Keep in mind you have to repeat the same steps for plugins and themes individually:
Step 5: Run a Compatibility Check (Optional)
If you have any essential plugins and you’re worried upgrading your PHP version might break compatibility, this is a precautionary step you can take to prevent it. It’s always recommended to use the latest versions of everything before you move on to the latest versions of PHP.
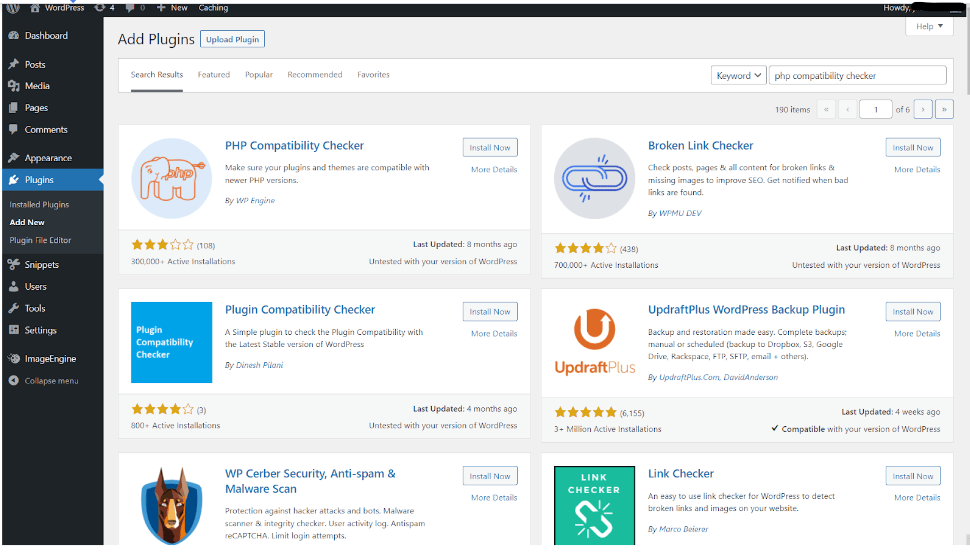
To check the PHP compatibility of your plugins, you’ll need to install a third-party plugin specifically for the job. For these steps, we recommend the PHP Compatibility Checker plugin:
1. Log into the WordPress dashboard, hover over “Plugins” in the lefthand menu, and click on “Add New”:
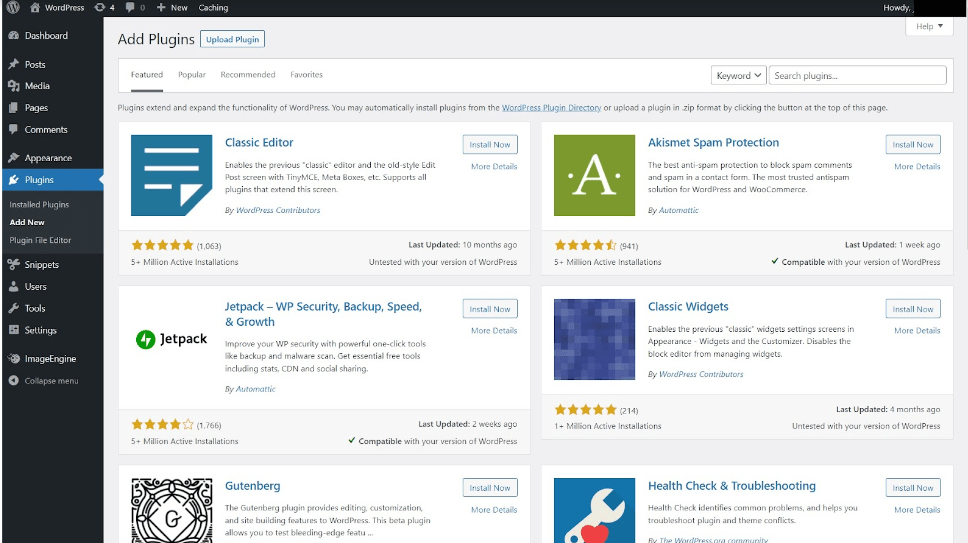
2. Search for the “PHP Compatibility Checker” plugin. When you find it, click “Install Now” and then “Activate”:
3. Go to “Tools” and then “PHP Compatibility” in the lefthand menu to open the plugin interface—usually, the plugin will show the current versions of PHP. You can choose the PHP version you want to check the compatibility for, as well as which plugins and themes to scan. Click “Scan site” to initiate the scan:
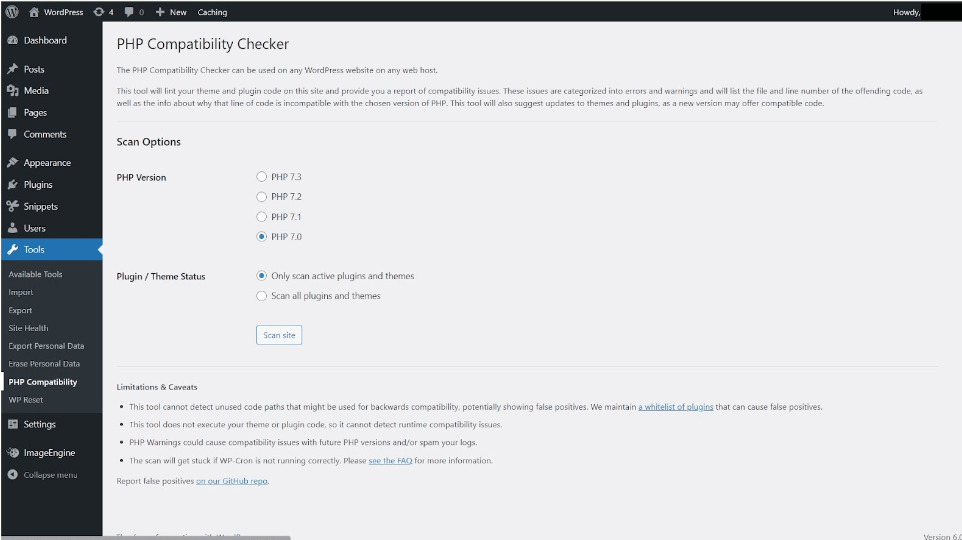
When it’s done, you should see a list of all the plugins compatible with that PHP version. You should do this before updating your PHP to see how it may affect your site.
Step 6: Update PHP Version
Like we said before, the steps might be different depending on your hosting provider or whether you host WordPress locally. However, we created these steps using Bluehost and cPanel, as most WordPress hosting services are based on cPanel.
Finally, we can now move on to updating your server to the newest version of PHP:
1. Log into your hosting dashboard. Go to Advanced settings in the lefthand menu if you use Bluehost, or whatever option takes you to cPanel using another host:
2. Scroll down to the “Software” section of the cPanel dashboard, look for the “MultiPHP Manager” icon, and click on it:
3. In the MultiPHP Manager dashboard, you can manage your PHP installation for each of your WordPress sites. In the “PHP Version” dropdown, make sure to select the latest PHP version (PHP 8.1 in this case), and check the box for the WordPress site you want to update PHP for. When everything is as it should be, click the “Apply” button:
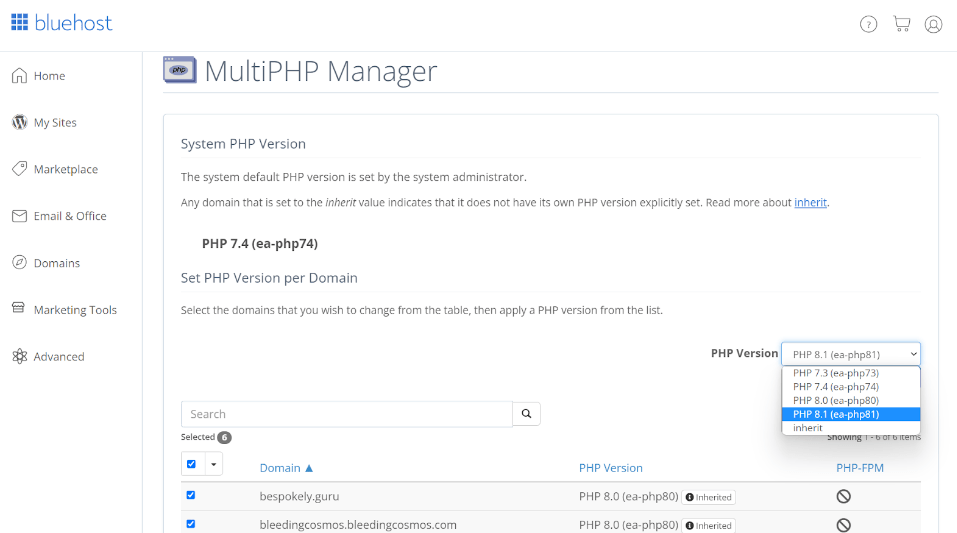
MultiPHP Manager should now go through and update the PHP version for all the sites you’ve selected. As you can see, this tool makes updating the PHP version of your WordPress server a breeze.
Step 7: Fix Possible Issues
As soon as you do something major like updating your PHP, you should immediately check your site for potential issues both as an administrator and as a normal website visitor.
In the admin panel, try to use some of your plugins—use some of the CMS tools like creating pages and posts to see if any bugs arise.
Also, visit your website from the front end like a visitor and check out all your important pages and try to use some of your website’s features—for example, filling in forms, clicking links or buttons, using menus, etc.
One thing you should know is the latest PHP version isn’t always the best PHP version for WordPress.
If you do find any issues, it’s most likely because of an incompatibility between the latest PHP version and your plugins. To see which plugin is causing the issue, you can deactivate your plugins and themes one by one. If the error stops happening, you’ll know it’s that plugin that’s affected. Your options will then be to roll back your PHP version or leave the plugin deactivated.
If there are many issues, it might be best to first roll back your PHP version to when it was working correctly. Keep checking when your plugins are compatible with the latest PHP version before attempting another install.
| DID YOU KNOW: Statistics show that over half (52%) of all WordPress security vulnerabilities are caused by plugins, and the most common root cause is outdated plugins. So, one of the best things you can do for your website’s security is learning how to update the PHP version in WordPress. |
Key Takeaways
| There are three things to keep in mind when changing your PHP version: the PHP version of your server, your WordPress version, and the PHP compatibility of your plugins. |
| Most WordPress websites are configured to stay up to date by default, but you can change this in the wp-config.php file. |
| Depending on your hosting provider, you’ll either need to manually backup your WordPress website in cPanel or use the backup features included with your account. |
| Outdated WordPress installations, plugins, and themes are one of the leading causes of security vulnerabilities. |
| Even if you update the PHP version in WordPress the right way, you might still introduce some issues by updating your PHP, so you should always check for errors afterward. |
Benefits of Having the Newest PHP Version
Keeping the PHP version of your WordPress installation up-to-date is one of your most important maintenance tasks as a website owner. Here’s why:
-
Better Security
Most security flaws are due to outdated plugins, themes, or WordPress core files. Plus, as PHP versions get older, hackers have more time to figure out potential vulnerabilities or security loopholes. PHP developers are also continuously working on making the code more inherently secure.
-
Faster Loading Speed
Although PHP isn’t a particularly slow or resource-intensive language, it’s also not among the fastest web programming languages. So, PHP developers are continuously working on optimizing its performance. If you know how to update the PHP version for WordPress, you can enjoy the performance improvements of the latest versions, 7.4 and 8.0.
-
Search Engine Optimization
PHP isn’t a great language for SEO because it has a somewhat complicated and unusual syntax, especially compared to HTML. So, new PHP versions are continuously optimized for “lean and clean” code that doesn’t interfere with search engine indexing.
| DID YOU KNOW: It’s estimated that roughly 80% of all websites today use PHP in one form or another. That puts it in the 5 most popular languages in web app development today, alongside JavaScript, HTML & CSS, etc. |
Conclusion
Hopefully, that answers the question “how do I update PHP in WordPress?” Keeping your WordPress website’s PHP version up to date and making sure your WordPress core files, plugins, and themes are compatible is one of the best things you can do for your website. This type of maintenance will play a huge role in keeping your website bug-free, performance-optimized, and secure.
FAQ
The simple answer is: yes. While most hosting providers automatically update your PHP version, you might be in between update loops. There are also times where you need to manually update themes, plugins, or WordPress files to be compatible with the latest PHP version.
At the time of writing, the latest stable version of PHP is version 8.0.8. However, most WordPress installations still use version 7.4. Because WordPress is based on PHP, it usually takes a while to catch up with the latest versions.
The answer depends on how you’re using PHP—above, we detail how to update PHP in WordPress through a hosting provider, as this is what most people use. However, if you have a local WordPress installation, you’ll need to use the phpMyAdmin software to update your PHP version.


![How to Find Someone’s Tinder Profile? [2024 Expert Guide]](https://review42.com/wp-content/uploads/2023/06/Finding-Someone-on-Tinder.jpg)